1Open the templates list
Click Inspection templates in the sidebar, then + New template. Give it a name (e.g. PDI, QC, Trade-in).
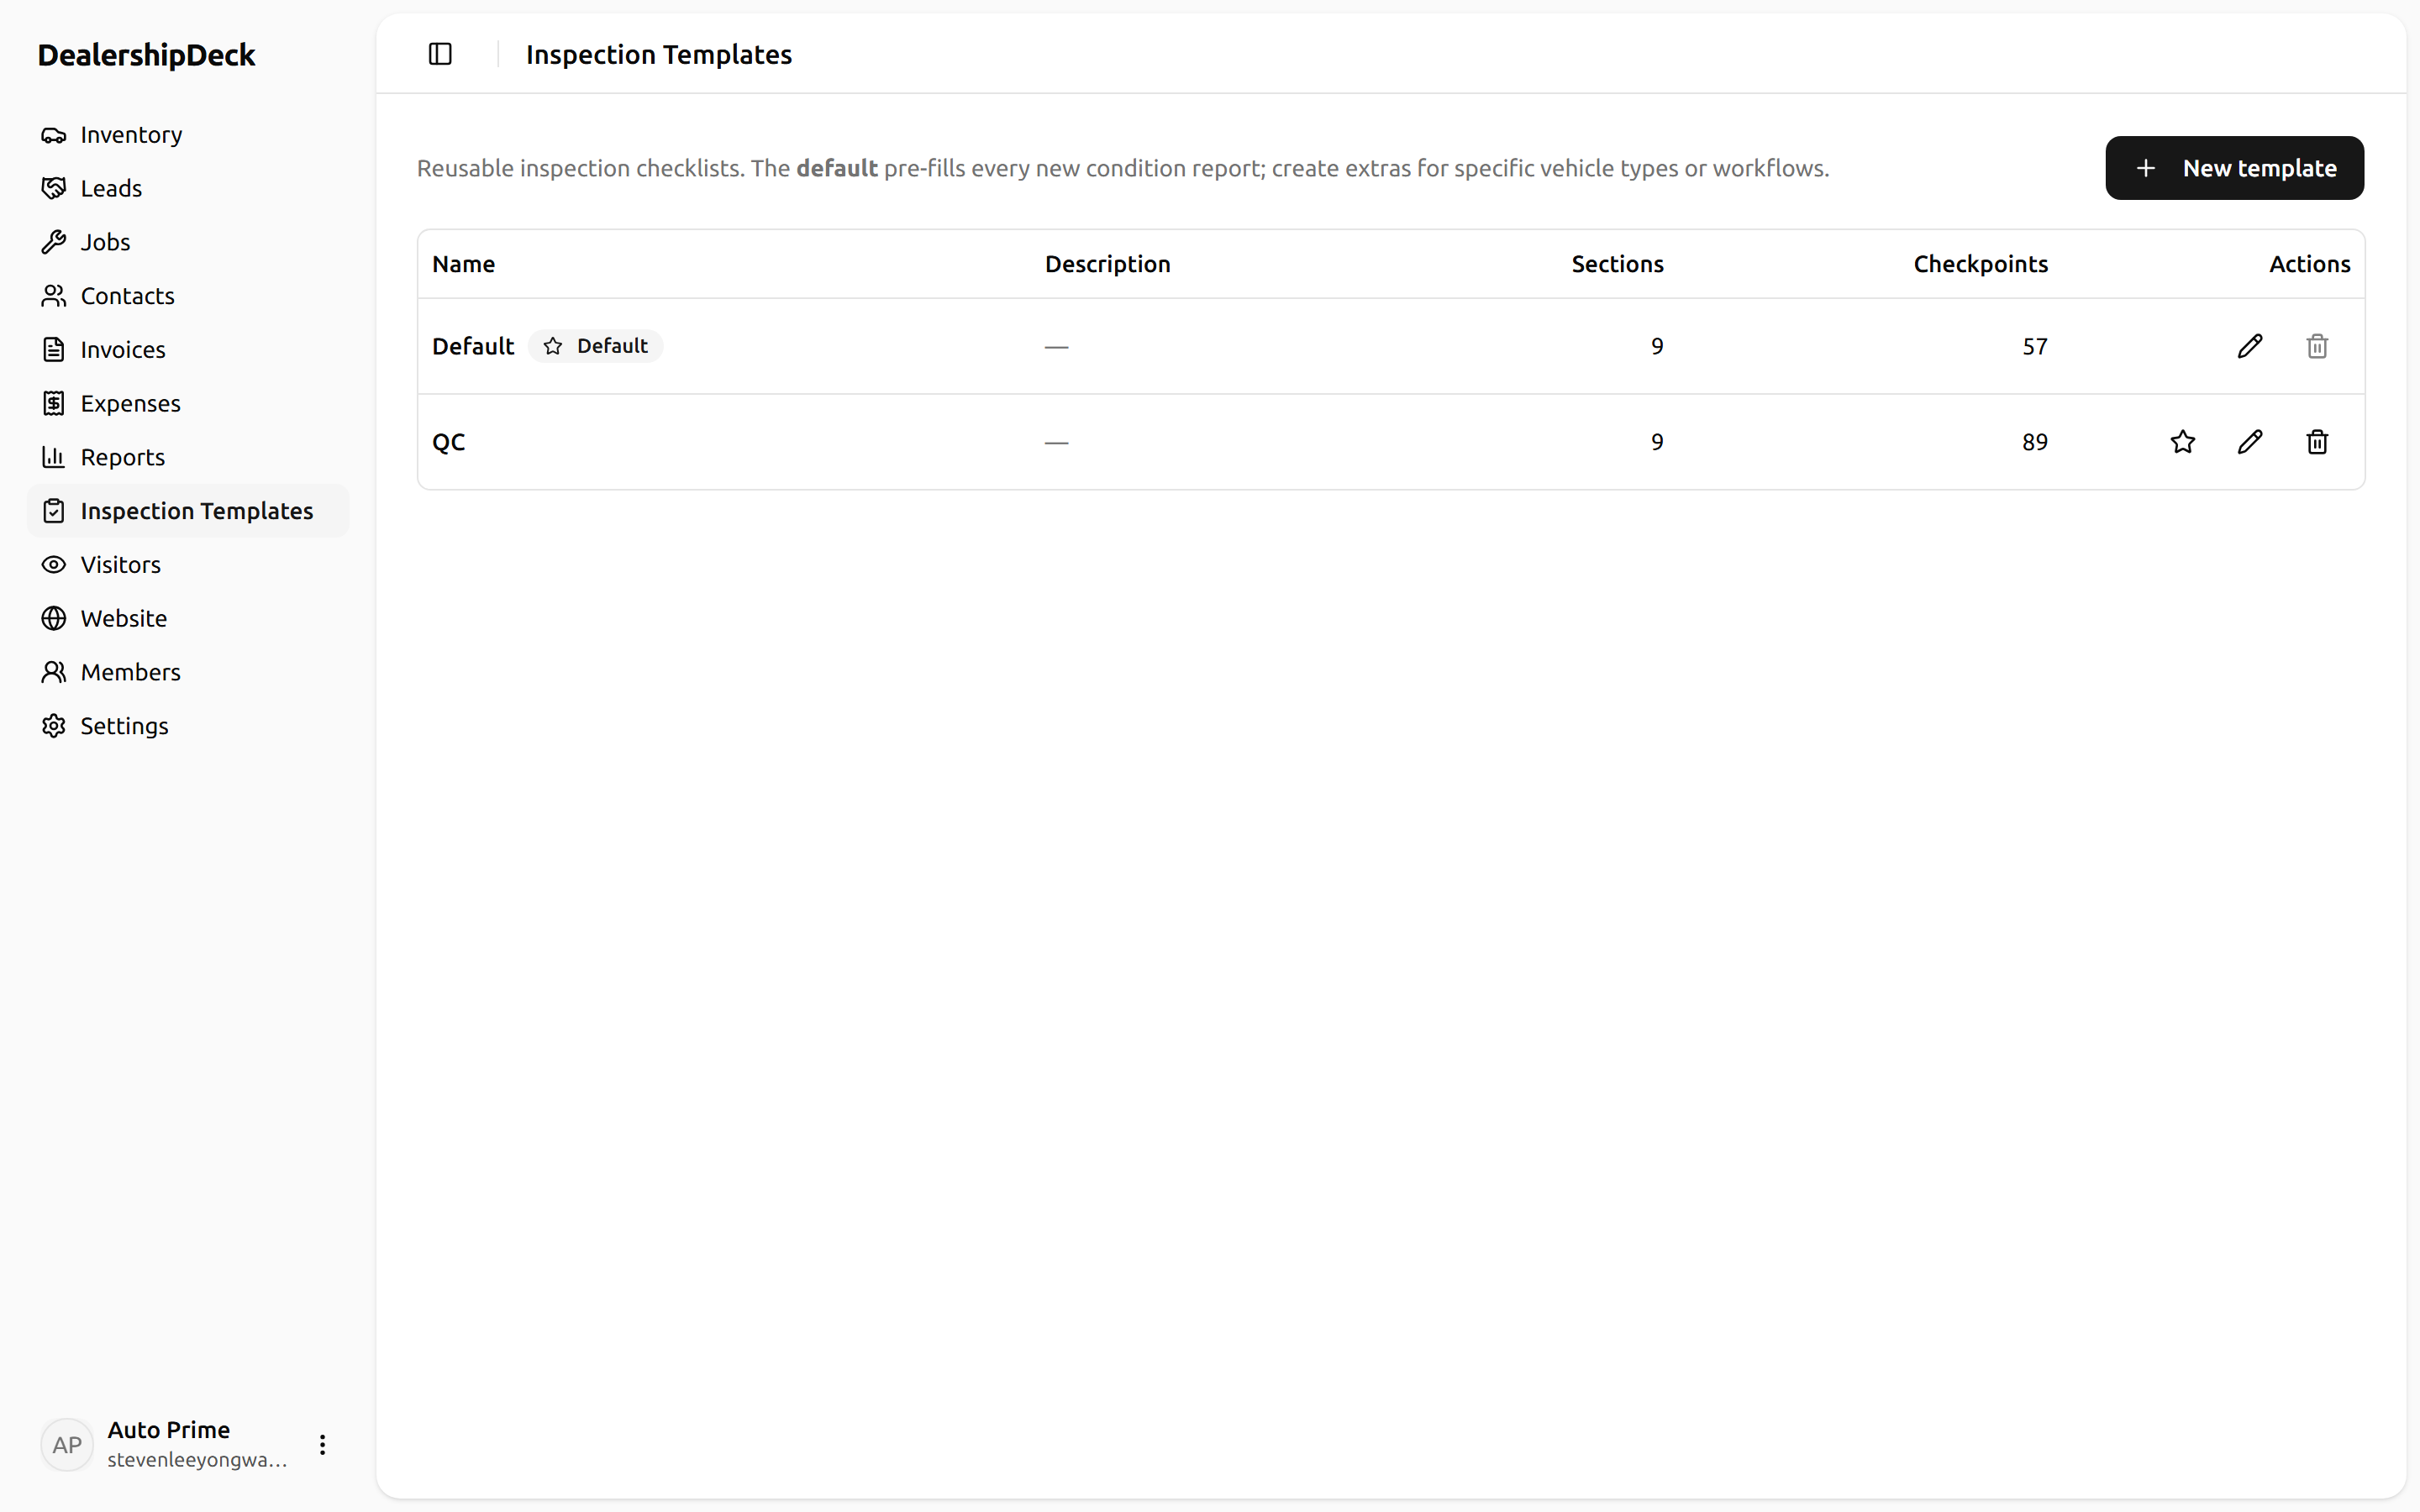
public/help/inspection-template-1.png — The /inspection-templates list page with the New-template dialog open.2Toggle the optional panels
Each template can include or skip three optional panels: the exterior dent map, the interior dent map, and the tyre/brake matrix. Turn them off if your inspection style doesn't use one — it hides them on the report form and the printable PDF.
public/help/inspection-template-2.png — The template editor showing the three panel toggles (Exterior dent map / Interior dent map / Tyre & brake) in their ON state.3Add sections and checkpoints
A template is a list of sections (e.g. Road test, Interior) each containing checkpoints. For every checkpoint pick an input type: Dropdown (the four-status answer) or Checkbox (pass/fail).
public/help/inspection-template-3.png — The template editor with one section expanded, showing 3-4 checkpoints with the input-type dropdown visible on one.4Set as default
Click Set as default on the template you want pre-selected when staff create a new condition report. Most dealers want their PDI template as the default.